GeoVision
Plugins
About Us
Blog
Help Center
Contact Us
X
Edit Content
Contact Us
Plugins
About Us
Blog
Book a Demo
Help Center
Get Strated For Free
Existing customer?
Log in
Log in
Get Started for Free
GeoVision
Help Center
Webapp Help Center
2. How to Create a Project on GeoVision Using Plugins?
2. How to Create a Project on GeoVision Using Plugins?
Projects can be created either from the plugins or the web app.
Register on GeoVision’s Website:
Download and install the required plugin for your design software from our website.
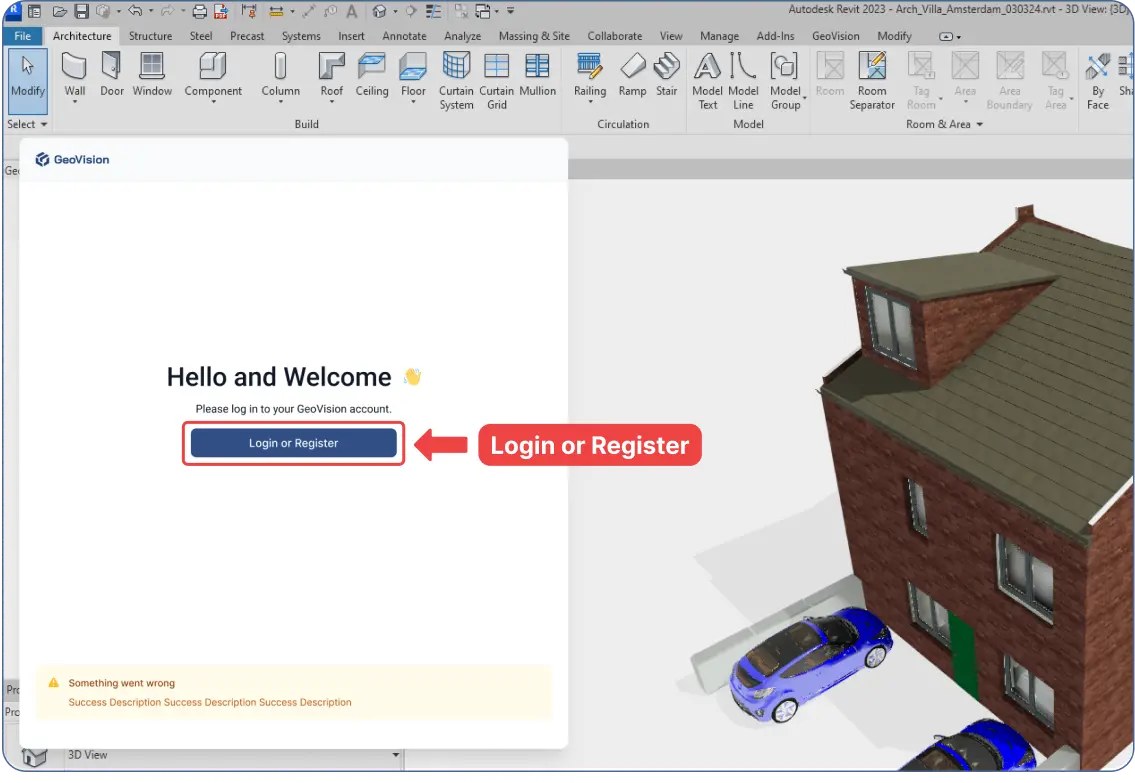
Log into the web app from the plugin window inside your design software after installation.
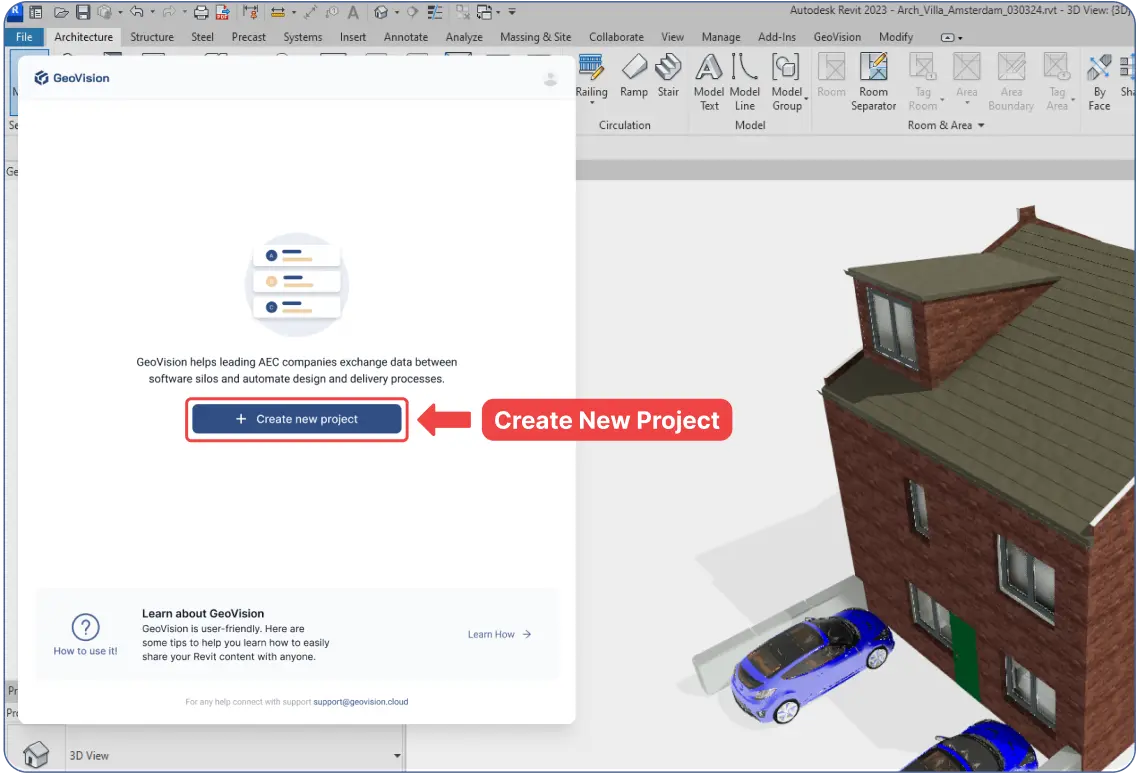
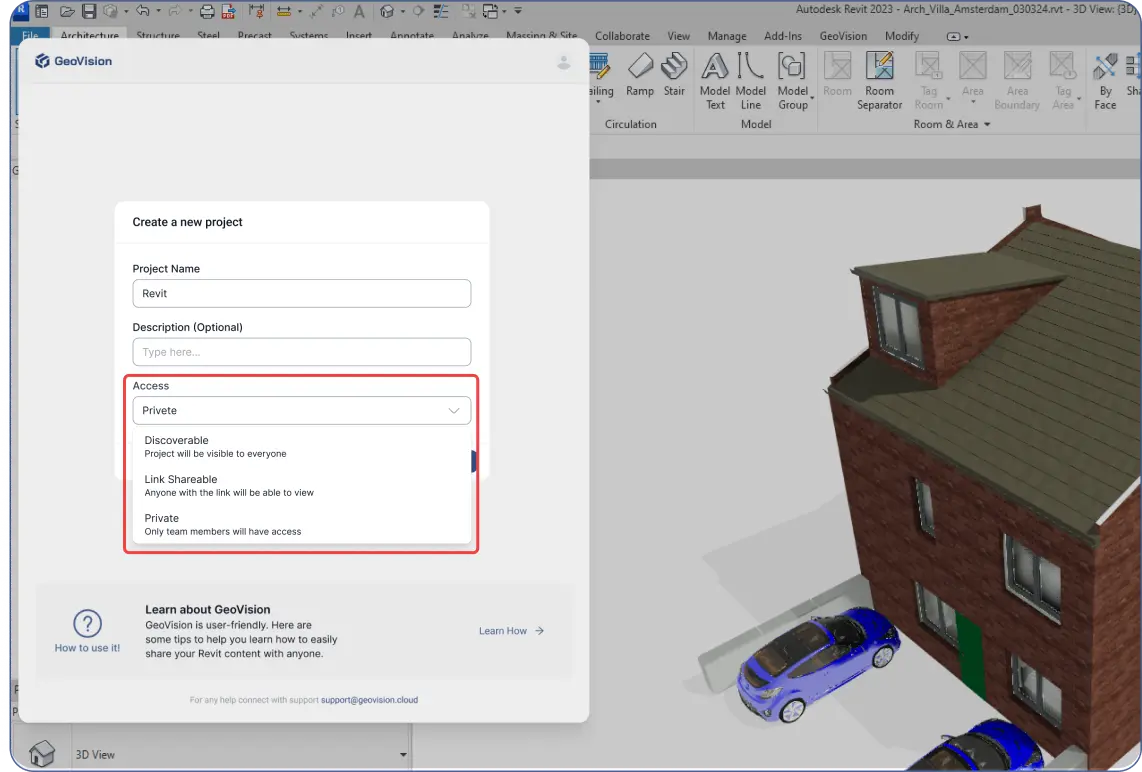
Click
“Create New Project.
”
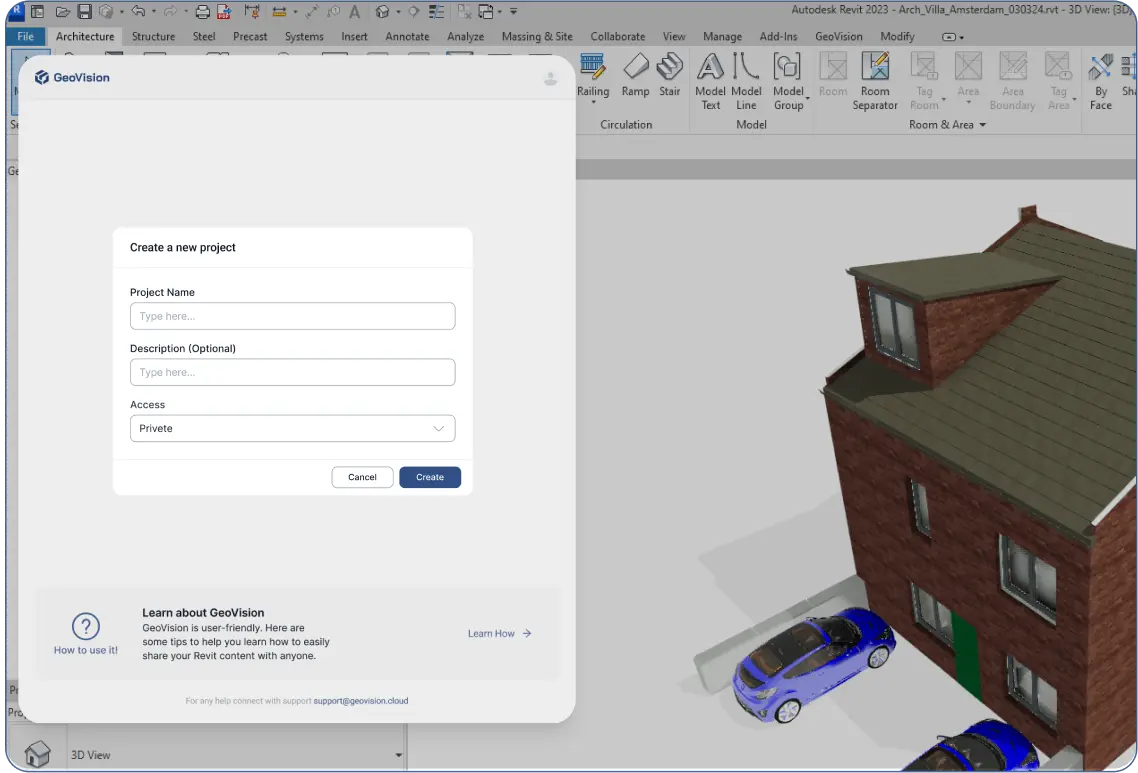
Enter your project’s
“Name,” “Description,”
and
“Access.”
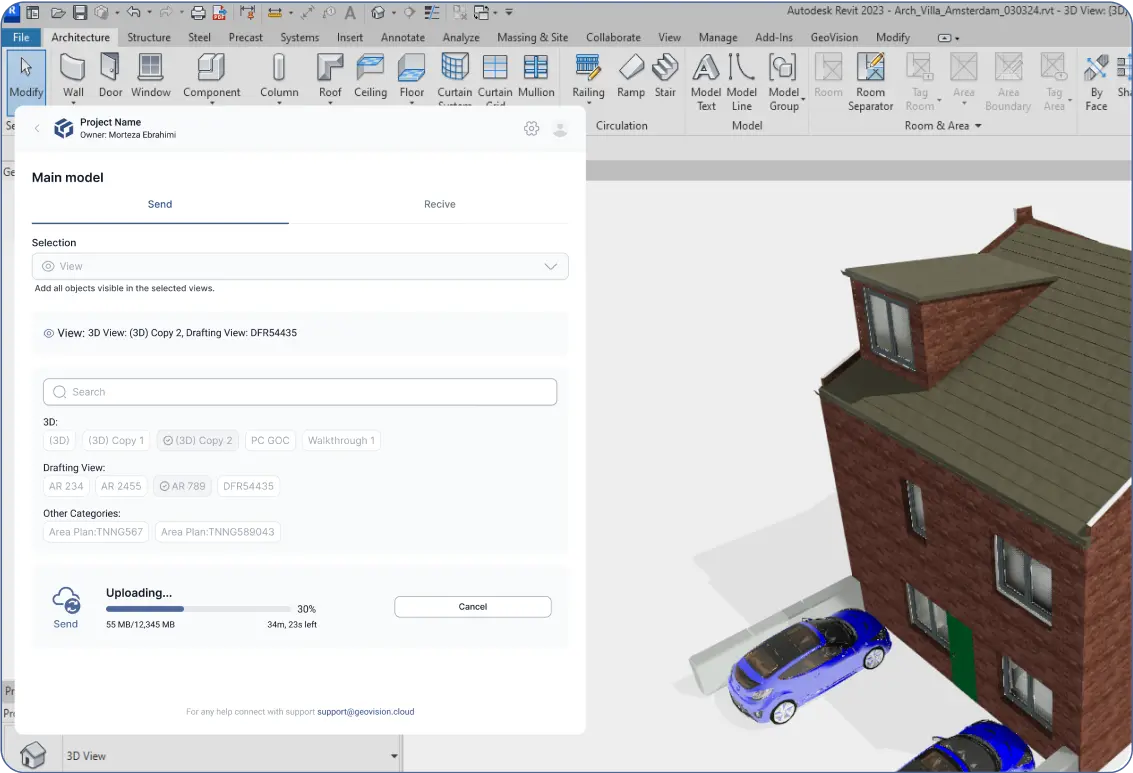
Your project will be created and listed inside the plugin window.
A browser window will open, linking to your web app dashboard, and showing the project created there.
Next steps:
“Create New Model.”
“Send”
your data to GeoVision’s cloud using the plugin.
Note on Access Options:
Discoverable:
Project visible to anyone, including through Google search.
Sharable Link:
Anyone with the link can view the project.
Private:
Only team members can access the project.
You can always edit your project’s preferences.
Related Guides
1. How to Get Started with GeoVision?
2. How to Create a Project on GeoVision Using Plugins?
3. How to Create a Model on GeoVision Using Plugins?
4. How to Manage a Model and Its Versions using GeoVision plugins?
5. How to Receive Files from the GeoVision Cloud Using Plugins?