GeoVision
Plugins
About Us
Blog
Help Center
Contact Us
X
Edit Content
Contact Us
Plugins
About Us
Blog
Book a Demo
Help Center
Get Strated For Free
Existing customer?
Log in
Log in
Get Started for Free
GeoVision
Help Center
Webapp Help Center
3. How to Create a Model on GeoVision Using Plugins?
3. How to Create a Model on GeoVision Using Plugins?
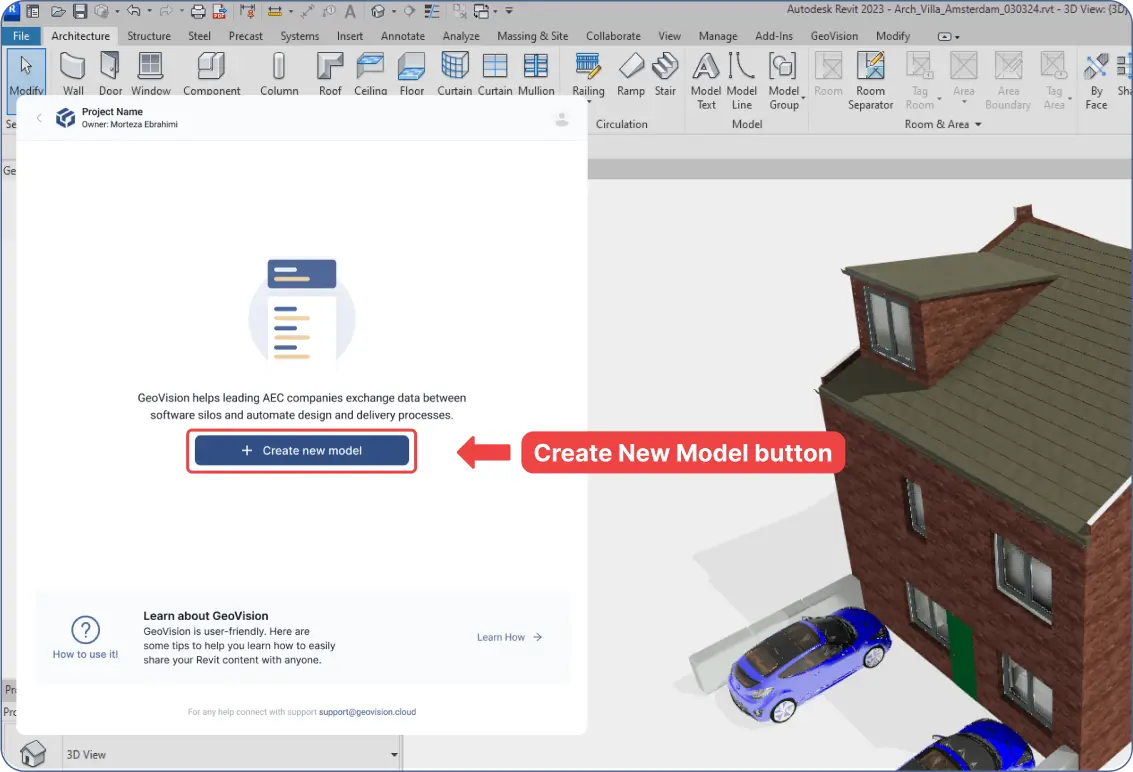
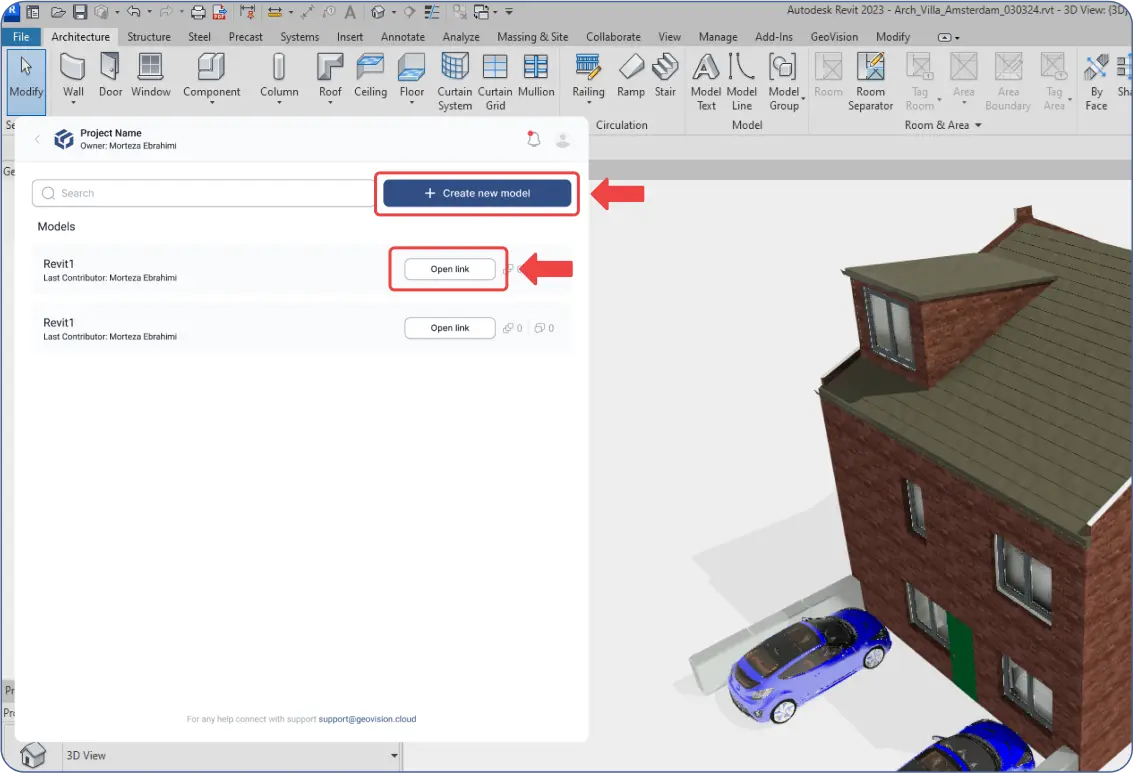
After filling in your project information, proceed to the "Create New Model" step.
Once you create your project inside the plugin:
Click "Create New Model."
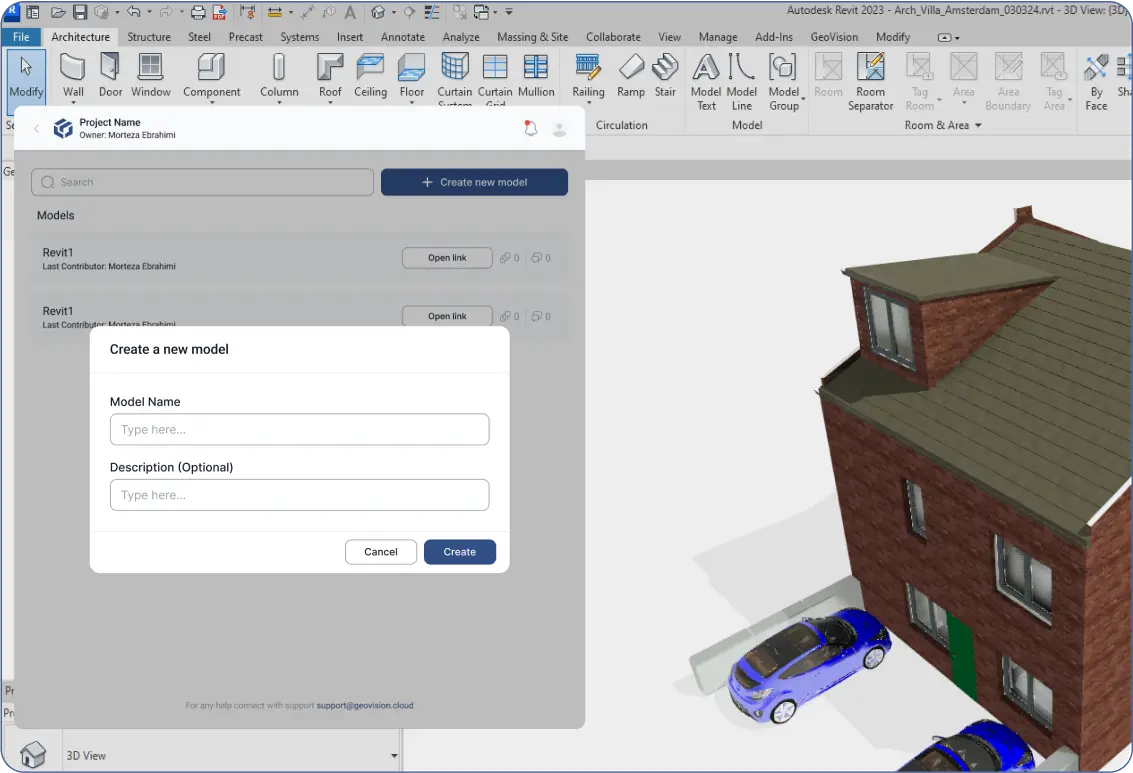
Fill in your model’s
"Name.
"
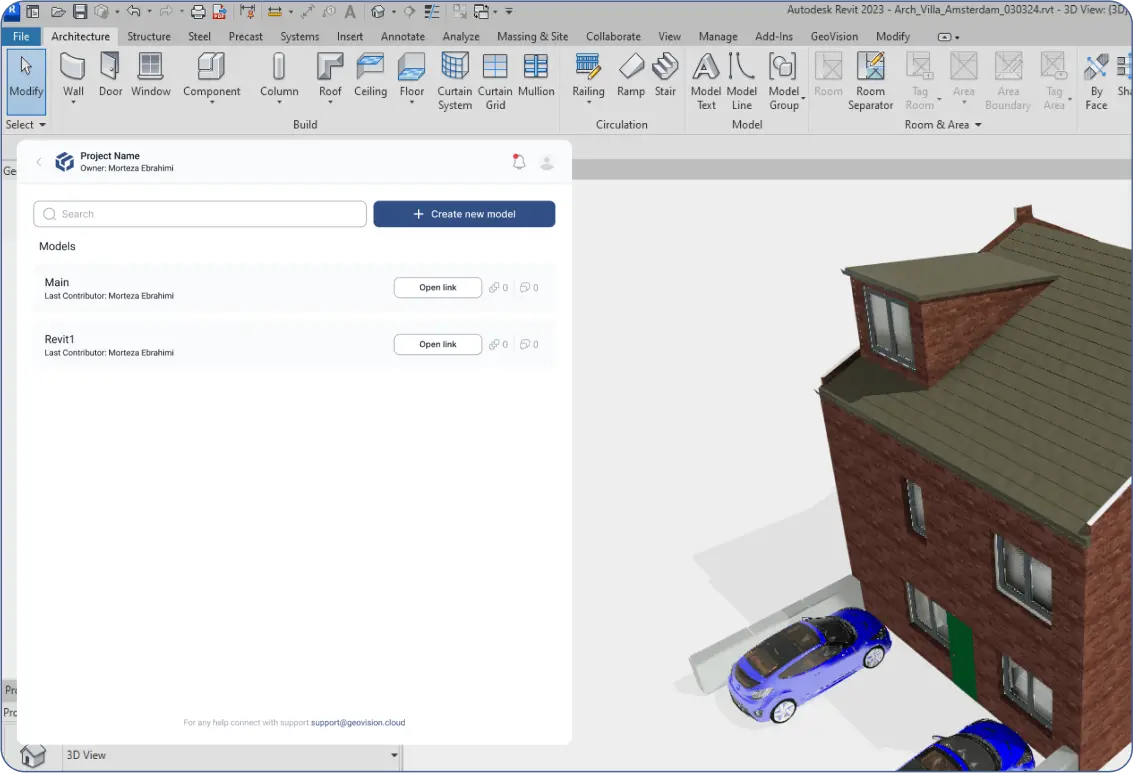
The model is then added to the models list inside your project as the “Main” model.
You can create it inside the web app, but sending data to models is only possible through the plugin (except for IFC, OBJ, or STL formats).
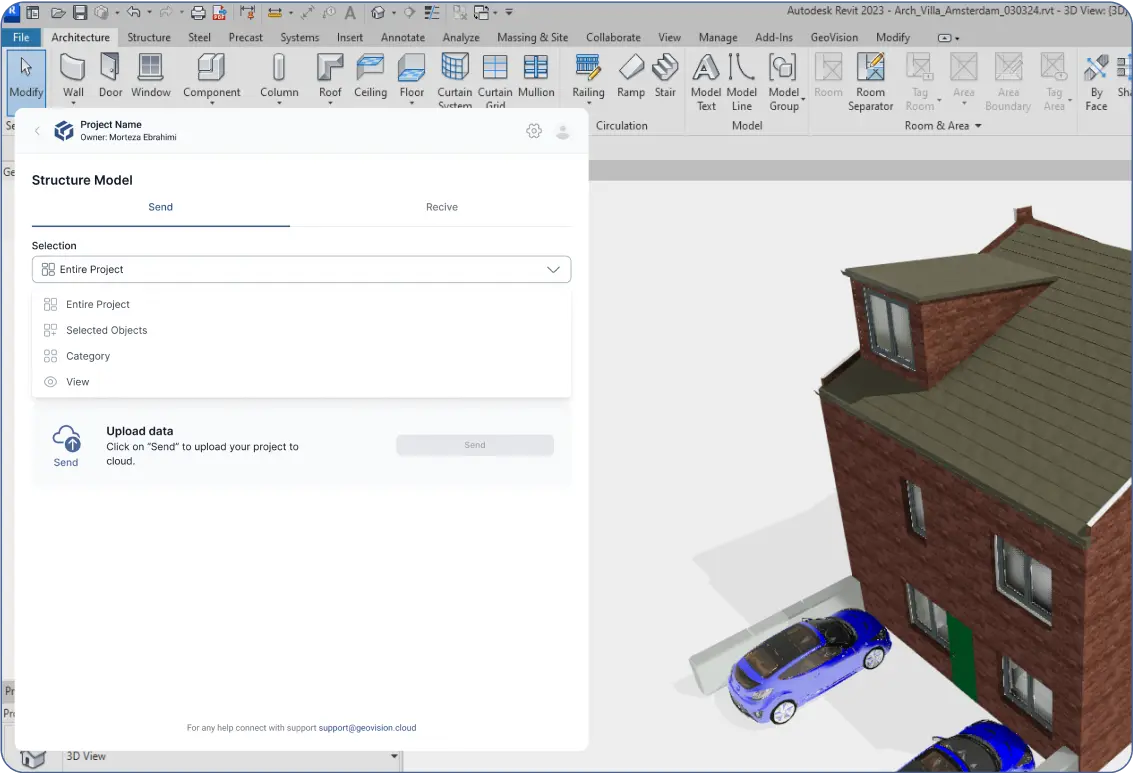
After creating your model:
Click “Send” inside the plugin.
Choose to send either the “Entire Project” or selected parts (e.g., categories or objects).
Wait for the upload to complete.
Your model and its data will be visible inside your project in both the plugin and the web app.
Press
"Open Link"
inside the plugin to open your model in the web app.
Note: You can add more models by returning to the project inside the plugin and selecting
“Create New Model.”
Related Guides
1. How to Get Started with GeoVision?
2. How to Create a Project on GeoVision Using Plugins?
3. How to Create a Model on GeoVision Using Plugins?
4. How to Manage a Model and Its Versions using GeoVision plugins?
5. How to Receive Files from the GeoVision Cloud Using Plugins?