- After filling in your project information, proceed to the "Create New Model" step.
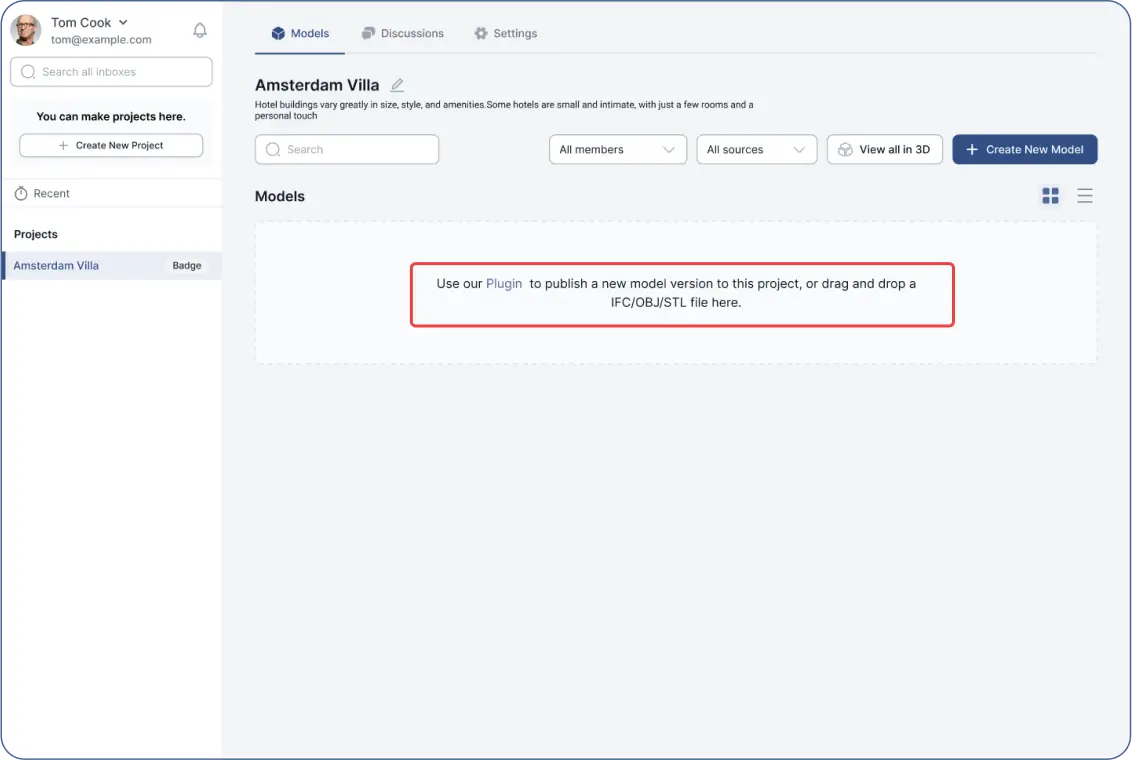
In the project's dashboard inside the web app:
- You’ll be prompted to download our plugins to send your model file.
- Alternatively, drag and drop an IFC, OBJ, or STL file into the window to create a model.
- It's recommended to download the plugins if you haven’t already.

After creating your model:
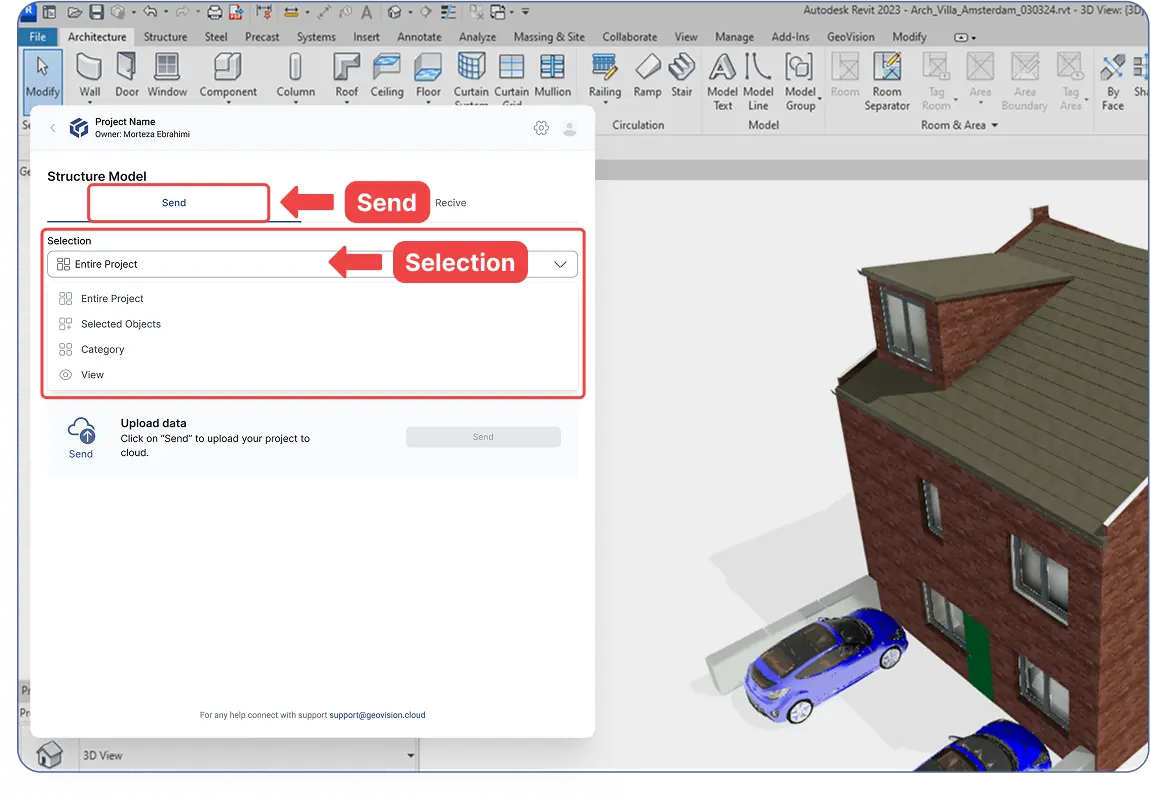
- Click “Send” inside the plugin.
- Choose to send either the “Entire Project” or selected parts (e.g., categories or objects).
- Wait for the upload to complete.
- Your model and its data will be visible inside your project in both the plugin and the web app.

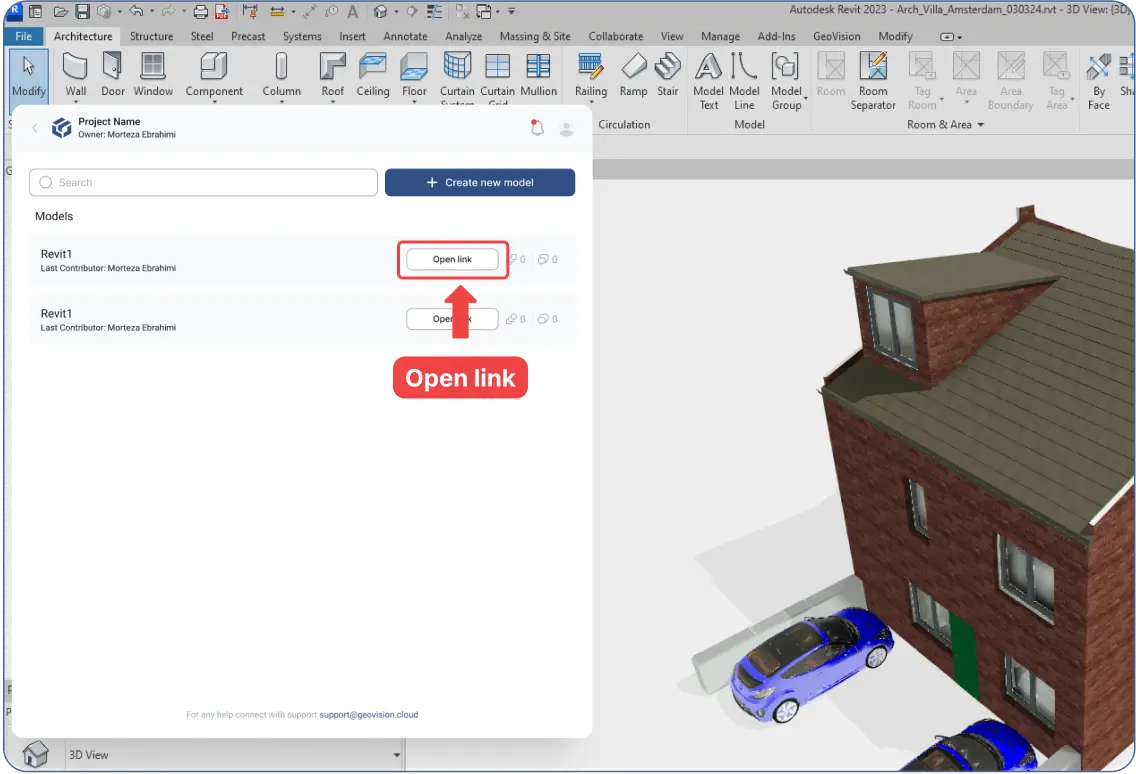
- Press "Open Link" inside the plugin to open your model in the web app.

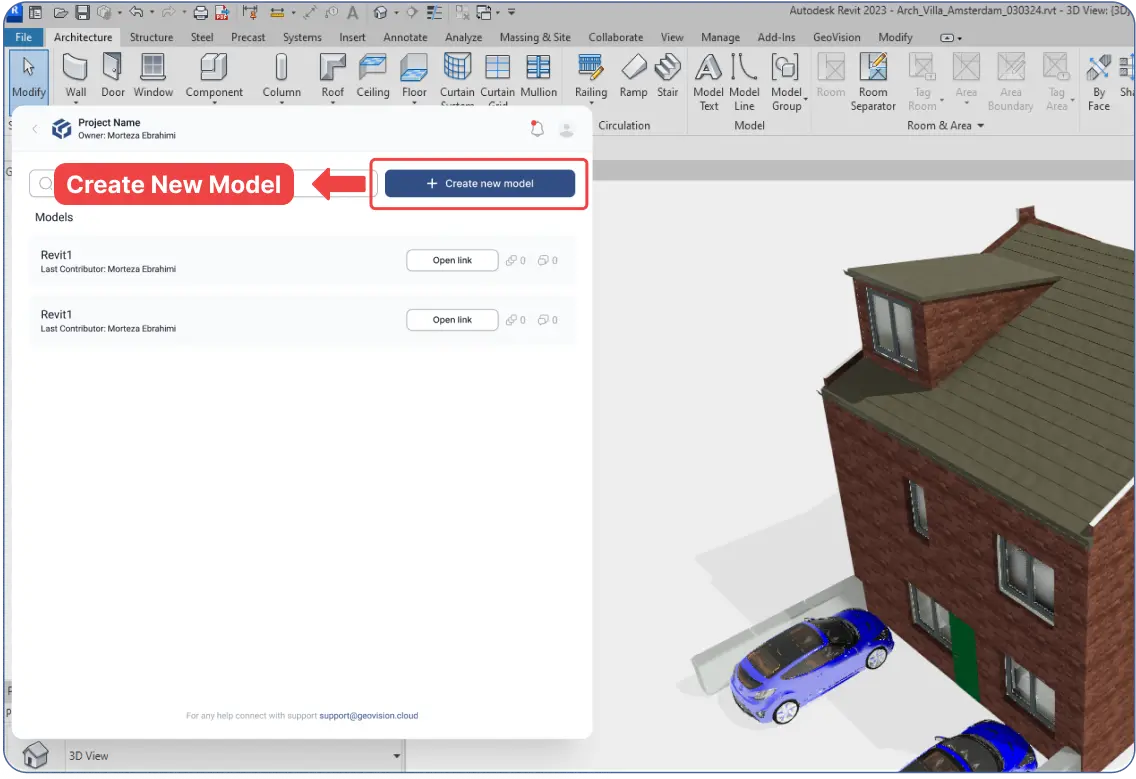
- Note: You can add more models by returning to the project inside the plugin and selecting “Create New Model.”
- Press "Open Link" inside the plugin to open your model in the web app.

