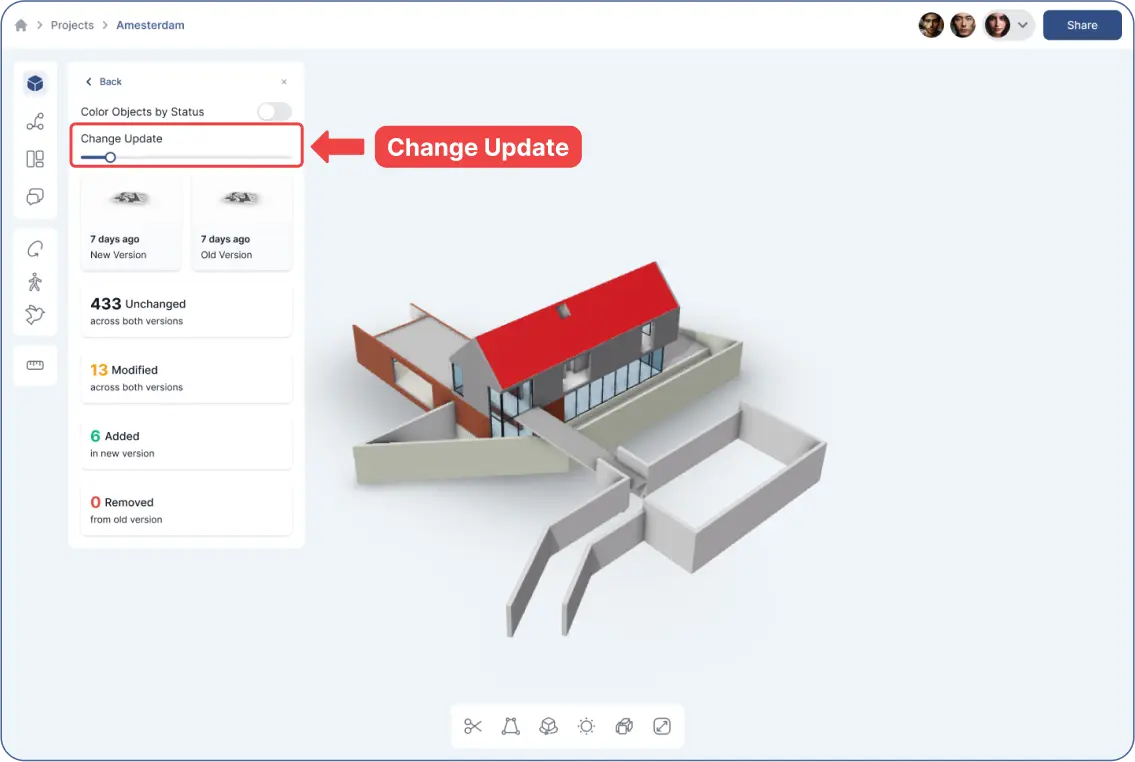
- Tracking project progress is essential for effective oversight. GeoVision allows you to track changes across different model versions easily.
Steps to Track Changes:
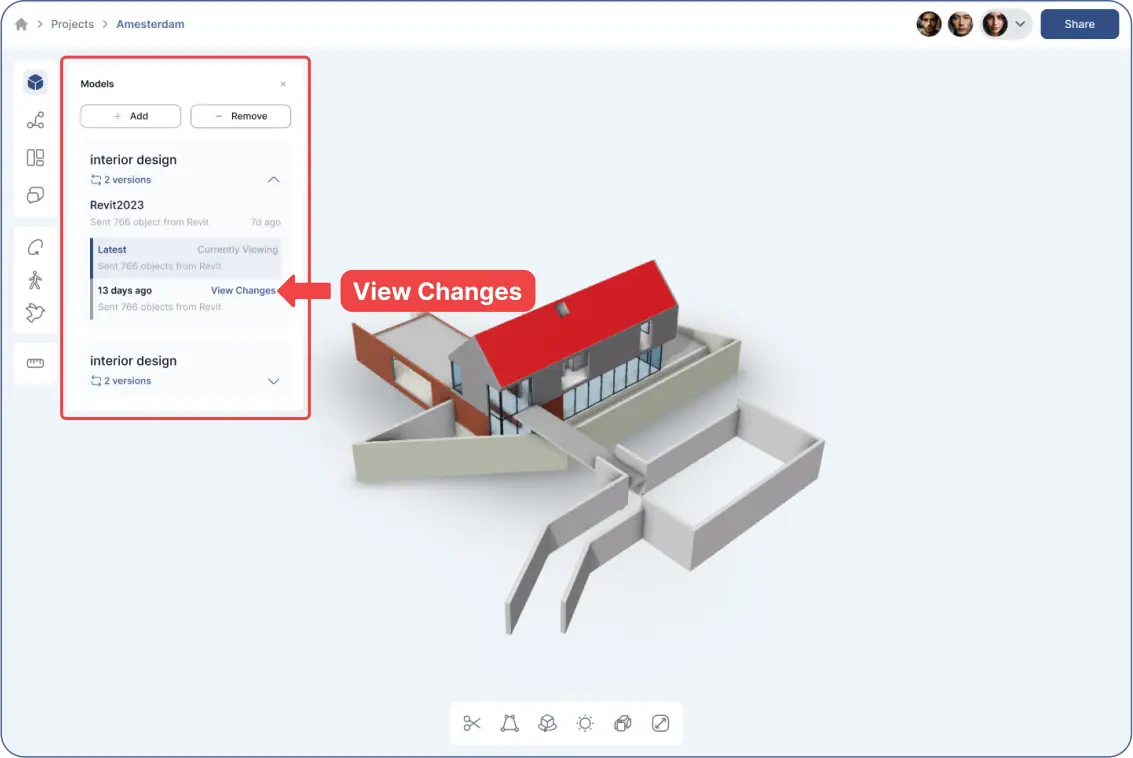
- Click the “Models” icon (the first icon on the left toolbar) inside the 3D viewer.
- All added models and their versions are listed there.
- Use the dropdown next to each model’s name to choose any two versions.
- Click “View Changes” to compare the two versions.
Buttons for Tracking Changes:
- Four buttons will appear to show changes:
- Unchanged
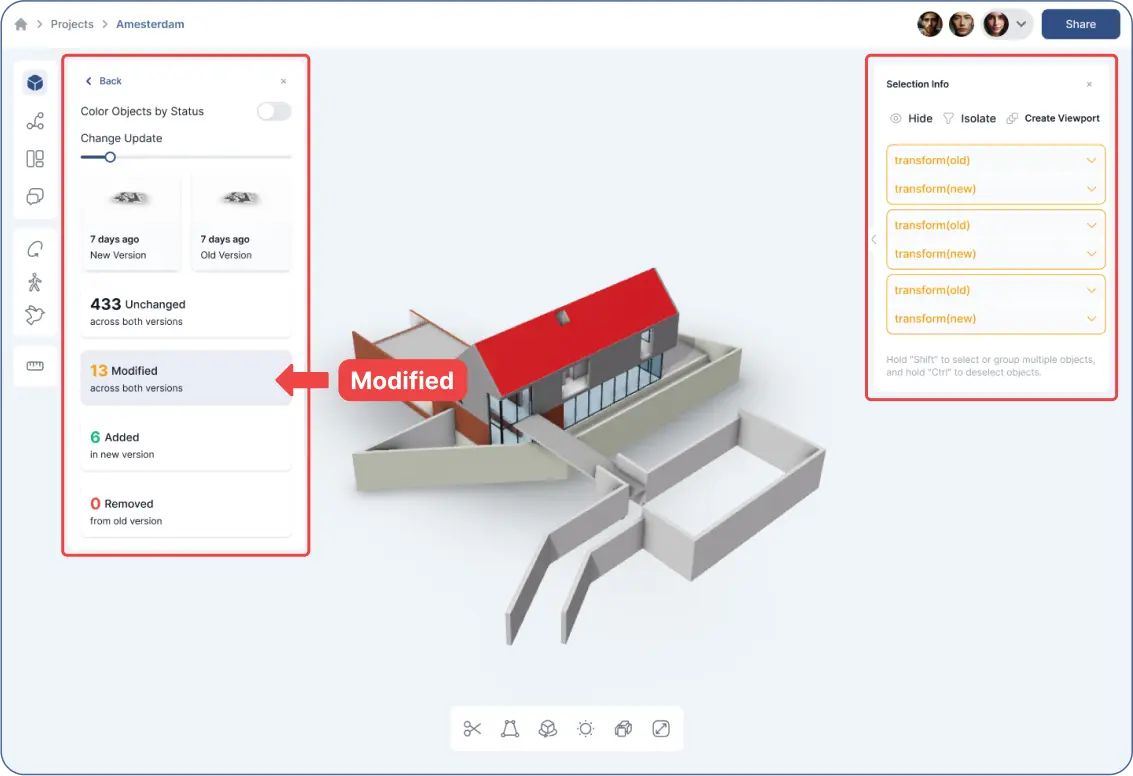
- Modified
- Added
- Removed
Viewing Details of Modified Objects:
- Click “Modified” to open a selection info box on the right.
- It lists “Old” and “New” objects that were modified.
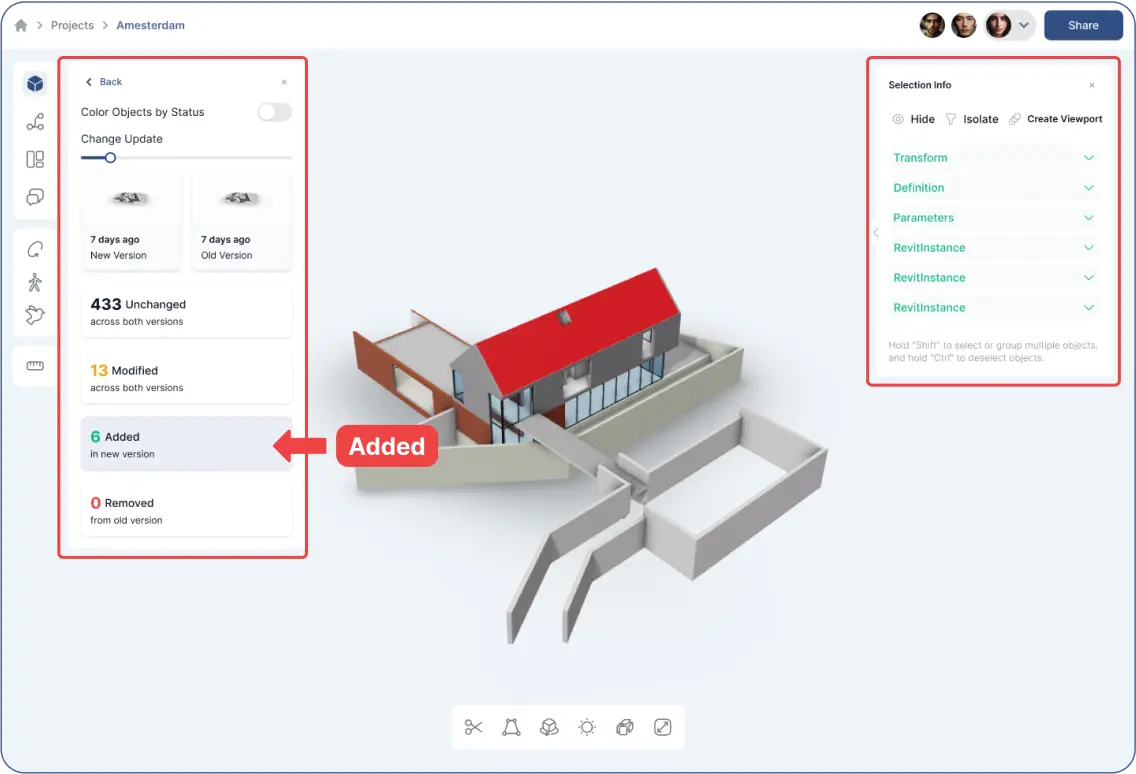
- “Added” gives a list of objects added.
- “Removed” shows a list of removed objects.
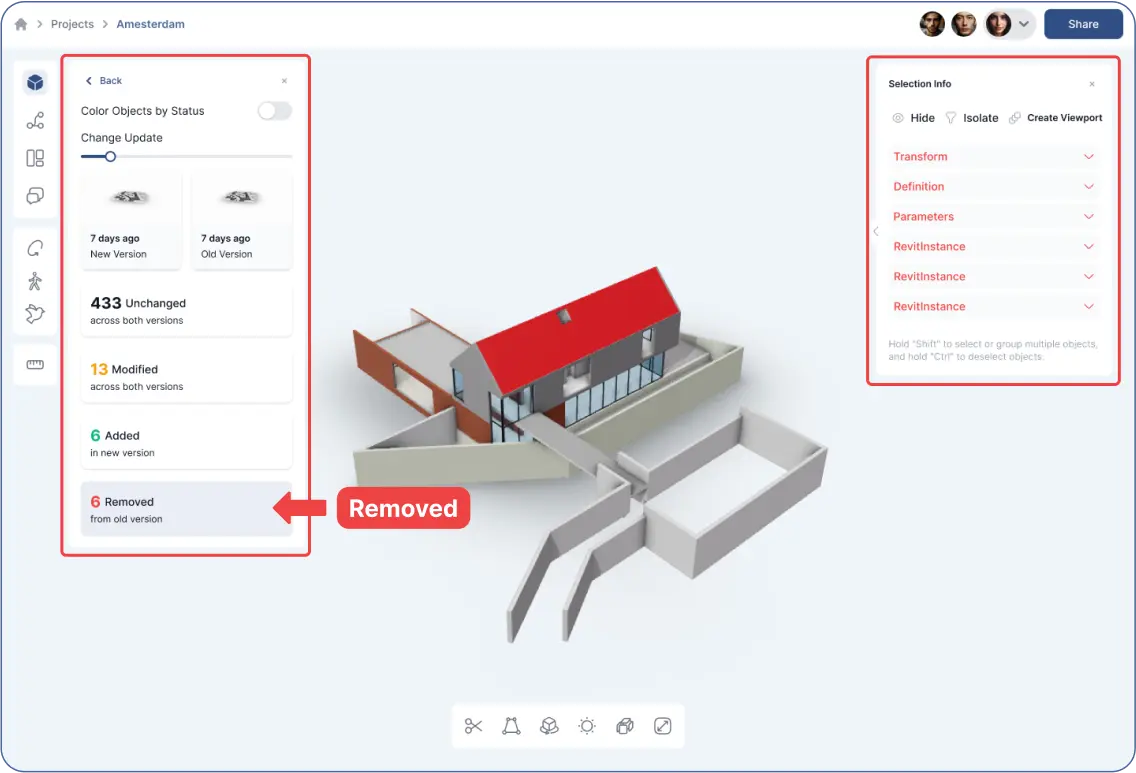
- All objects in the lists are clickable:
- Clicking on an object will take you to its location in the 3D viewer.
- You can choose to “Hide” or “Isolate” objects:
- “Hide”: Hides the selected object, showing the rest.
- “Isolate”: Keeps the selected object visible and hides the rest.
Using Color-Coded Status:
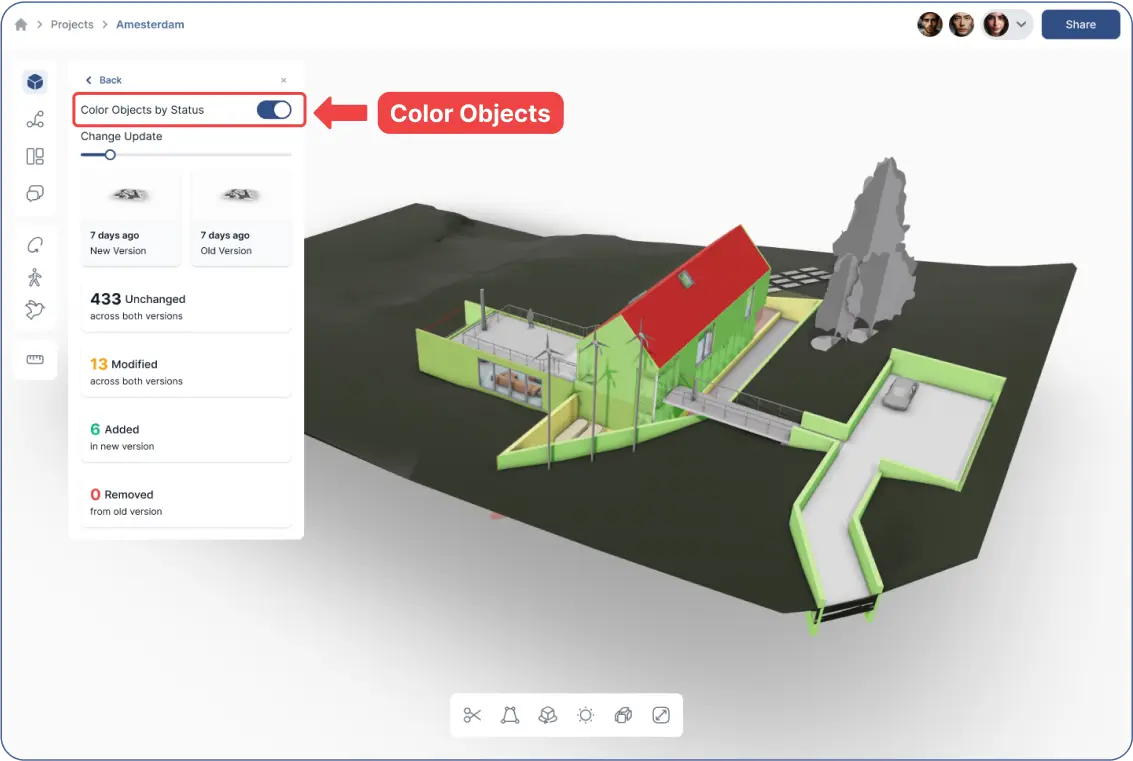
- Turn on “Color Objects by Status” in the “Models” icon:
- Modified objects appear in yellow.
- Added objects appear in green.
- Removed objects appear in red.
Using the Change Update Progress Bar:
- Drag the “Change Update” progress bar to see changes applied between two versions gradually inside the 3D viewer.
