GeoVision
Plugins
About Us
Blog
Help Center
Contact Us
X
Edit Content
Contact Us
Plugins
About Us
Blog
Book a Demo
Help Center
Get Strated For Free
Existing customer?
Log in
Log in
Get Started for Free
GeoVision
Help Center
Webapp Help Center
3. How to Create a Project on GeoVision Using Web App?
3. How to Create a Project on GeoVision Using Web App?
Projects can be created either from the plugins or the web app.
Creating a Project using the Web App:
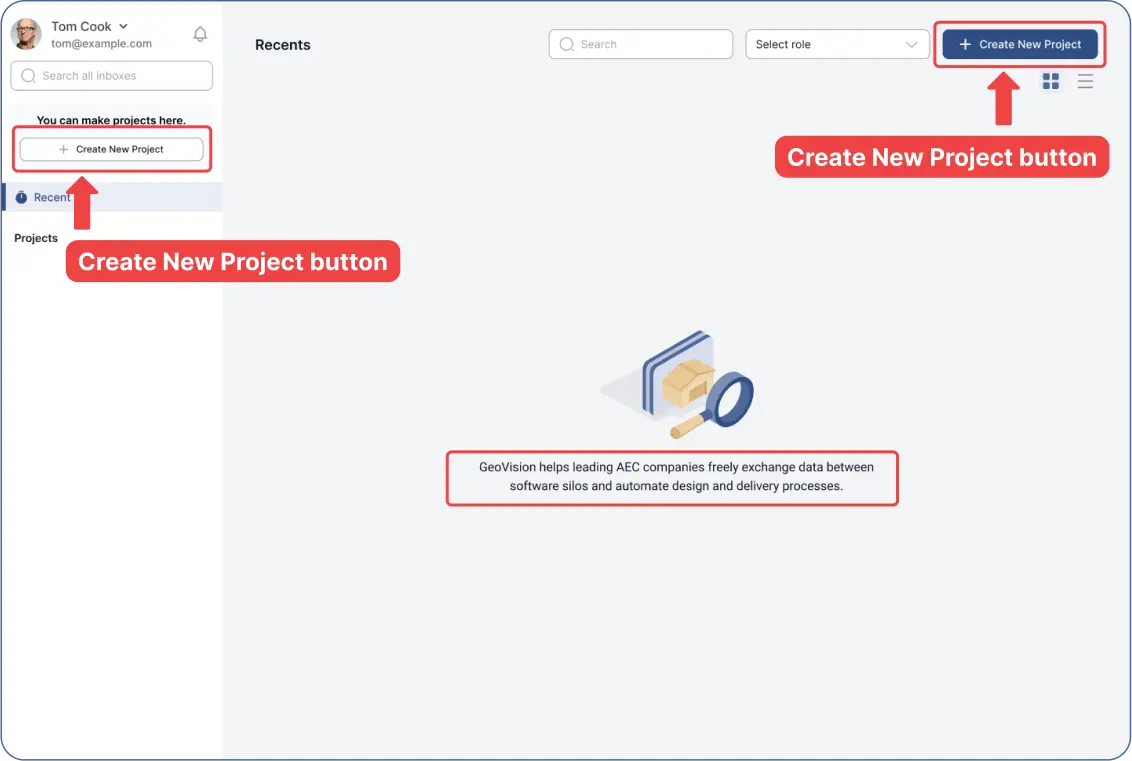
Log into the web app.
You’ll be led to the web app’s main page.
Click the
“Create New Project”
button under your profile image in the sidebar or the upper bar.
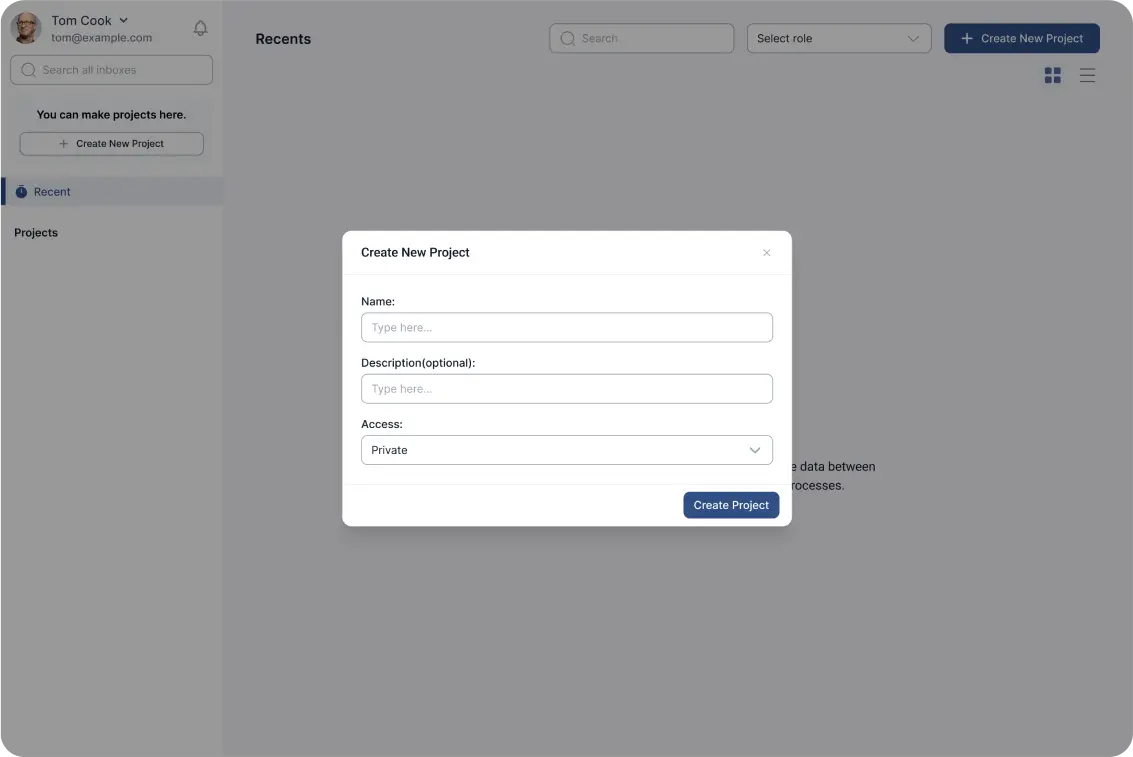
Enter your project’s
“Name”, “Description”,
and
“Access.”
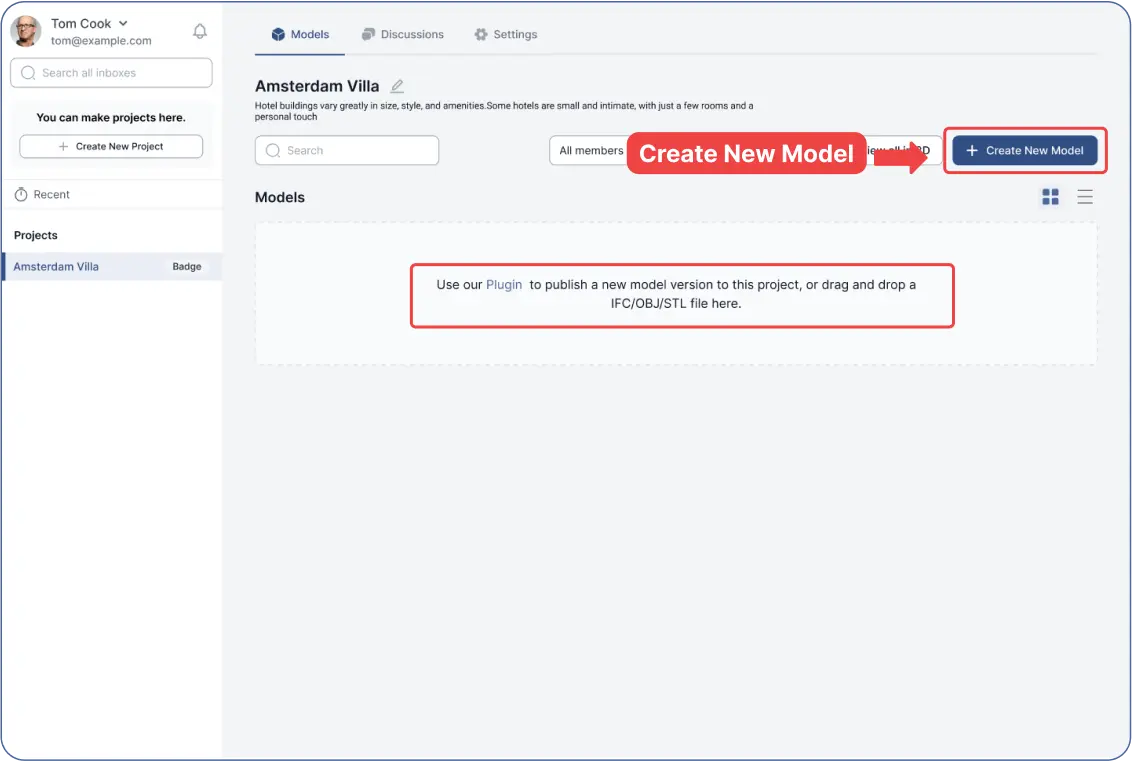
Next steps:
“Create New Model”.
Note:
“Sending”
files is only possible through plugins, except for some file formats.
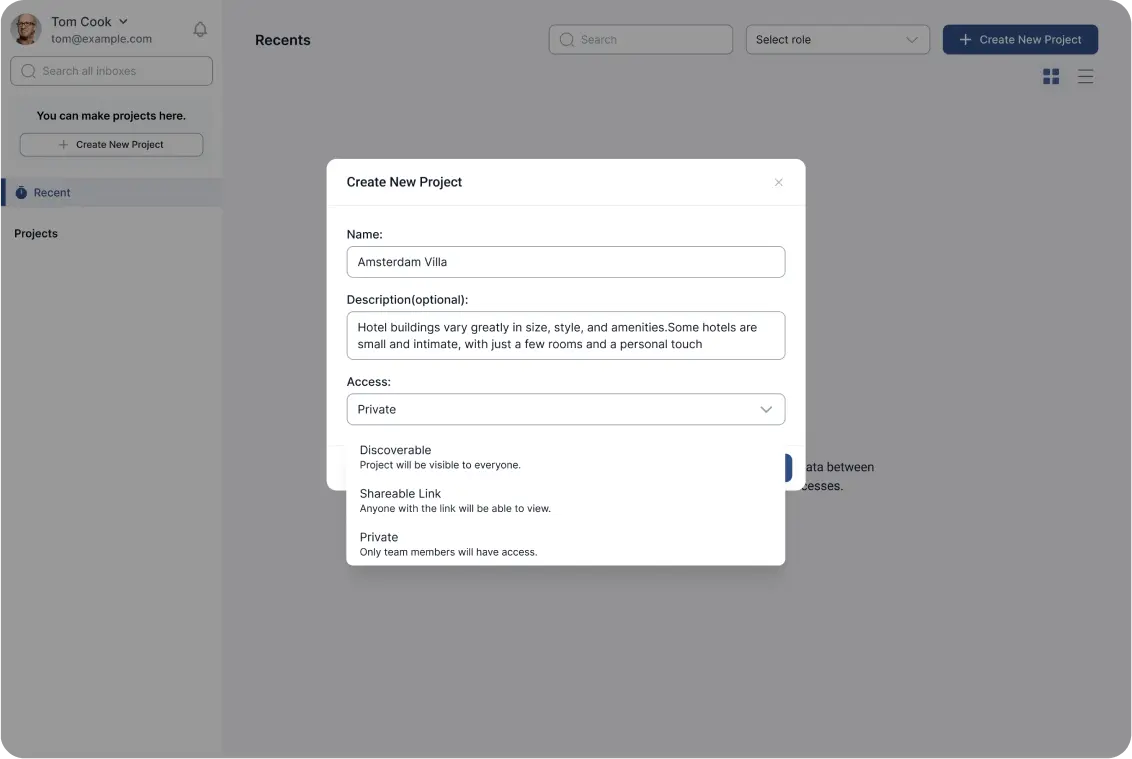
Note on Access Options:
Discoverable:
Project visible to anyone, including through Google search.
Sharable Link:
Anyone with the link can view the project.
Private:
Only team members can access the project.
You can always edit your project’s preferences.
Related Guides
1. How to Get Started with GeoVision?
2. How to work with the navbar menu inside the GeoVision web app?
3. How to Create a Project on GeoVision Using Web App?
4. How to Create a Model on GeoVision Using Web App?
5. How to Manage a Model and Its Versions Using GeoVision Web App?
6. How to Manage a Project on the GeoVision Web App?
7. How to Work with Models Inside GeoVision’s 3D Viewer?
8. How to Track Changes in Different Model Versions Using GeoVision’s 3D Viewer?
9. How to Use Scene Explorer Inside GeoVision’s 3D Model Viewer?
10. How to Create a Viewport Using GeoVision’s 3D Viewer?
11. How to Begin Discussions Inside GeoVision’s 3D Model Viewer?
12. How to Efficiently Navigate Your Model Inside GeoVision’s 3D Viewer?
13. How to View Measurements Inside GeoVision’s 3D Model Viewer?
14. How to Work with the Tools inside the 3D Model Viewer’s Bottom Toolbar?