Supported Versions: GeoVision currently supports Rhino versions: 7 & 8.
Note: The Rhino plugin works on Windows only.
Setup
1. Install the Plugin
Install the GeoVision Rhino Plugin if you haven’t already. (See Installing Plugins for help.)
2. Open the Rhino Plugin
In Rhino, type GeoVision in the command line or go to the GeoVision tab in the ribbon.
Click GeoVision to open the Rhino plugin.
If you’re not signed in, select Sign in and link your GeoVision account.
Publishing a Model
1. Select Publish
Click Publish in the GeoVision plugin interface.
2. Choose a Project
Select an existing project. or
Click New Project to create a new one
3. Choose a Model
Select an existing model. or
Click New Model to create one.
4. Select Objects to Publish
In the Rhino viewport:
Select the elements you want to publish.
Click Publish.
Your model is now uploaded to GeoVision and available to your team for viewing and collaboration.
Loading a Model
1. Select Load
In the GeoVision plugin, click the Load button.
2. Choose a Project
Select the project that contains the model you want to load.
3. Choose a Model
Select the model you’d like to load into your Rhino session.
4. Choose a Version to Load
By default, the latest version appears first.
If you want to load a previous version, select it from the version list.
Your selected model is now successfully loaded into Rhino.
Important Notes on Rhino Publishing:
Supported Rhino Elements for Publishing:
All visible geometry types can be published, including hatches, text, and blocks. Each published object includes the following information:
Name
Color
Render material
User-defined attributes (user strings)
Publishing Models from Rhino Layers:
While publishing a new version, click the blue filter field at the top of the Select Objects dialog.
2. Choose “Layers” from the options. 3. Select as many layers as you’d like to include in the filter.
Fixing Incorrect Colors in the Web Viewer:
If your model appears with the wrong colors in the browser:
Open the model in the viewer.
In the sidebar, click the View Modes button.
Change the view mode to Shaded to display the correct colors.
Missing Objects after Publishing a Model:
After publishing your model to GeoVision, click the Report button to view any errors that may have occurred. Click on any item in the report to highlight it in your application. Some objects might not be supported for publishing and could be excluded automatically.
Important Notes on Rhino Loading:
Loading Models into Rhino from GeoVision:
When you load a model into Rhino, all objects from GeoVision are brought in as geometry, text, or blocks, mirroring the same layer structure as what you see in the web viewer. Each object retains key attributes, including:
Render material (if any)
Color (if any)
Name (if set)
Custom properties stored as user strings
Loading Custom Properties in Rhino:
All custom properties found under the properties field will be created as user strings in Rhino.
Missing Objects After Loading a GeoVision Model:
After loading a GeoVision model, use the Report button to check for any errors that occurred during loading. Clicking an item in the report will highlight it in your application. Note that some objects may not be supported for loading in Rhino.
Project Selection Disabled in the UI:
This occurs because you don’t have the necessary permissions to load the project. Please contact the project owner to request a role change.
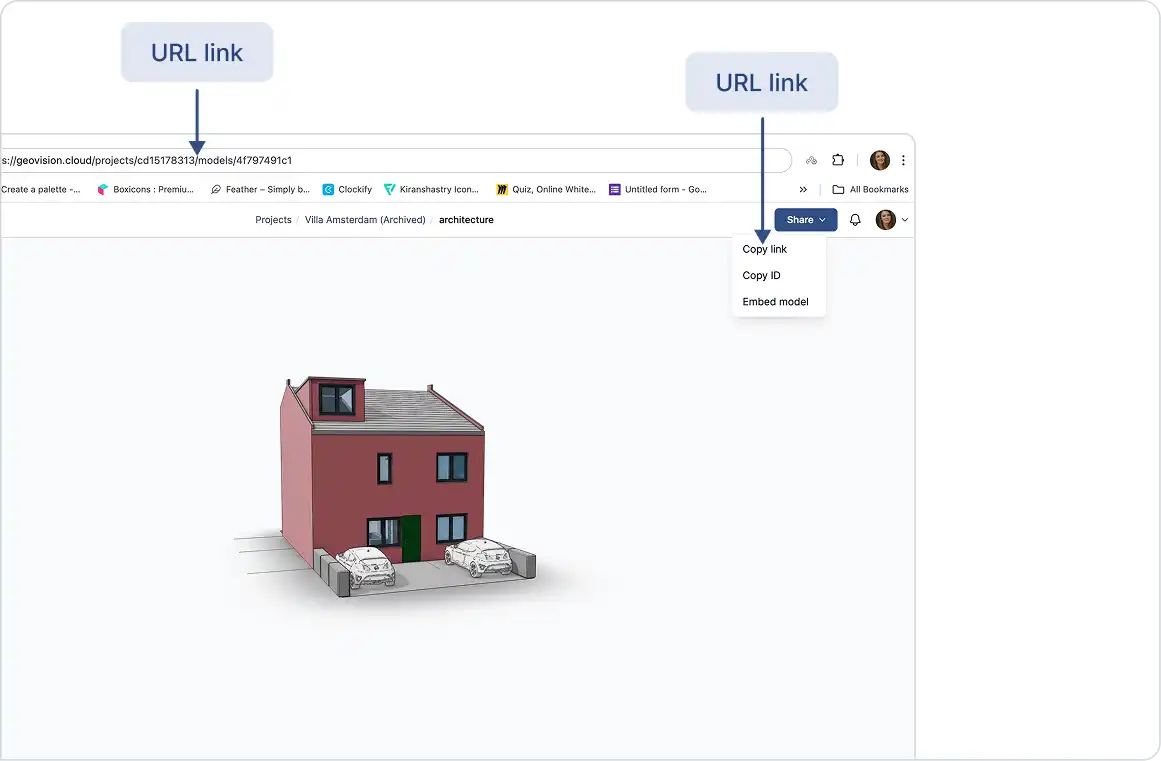
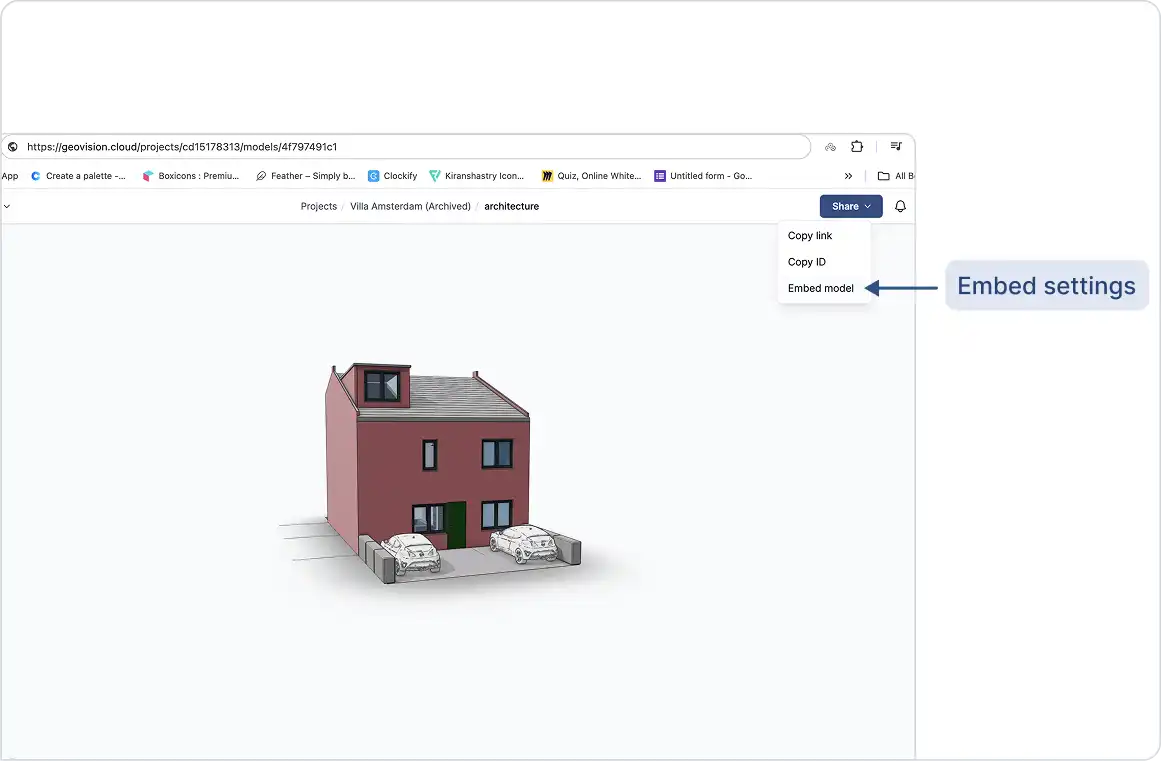
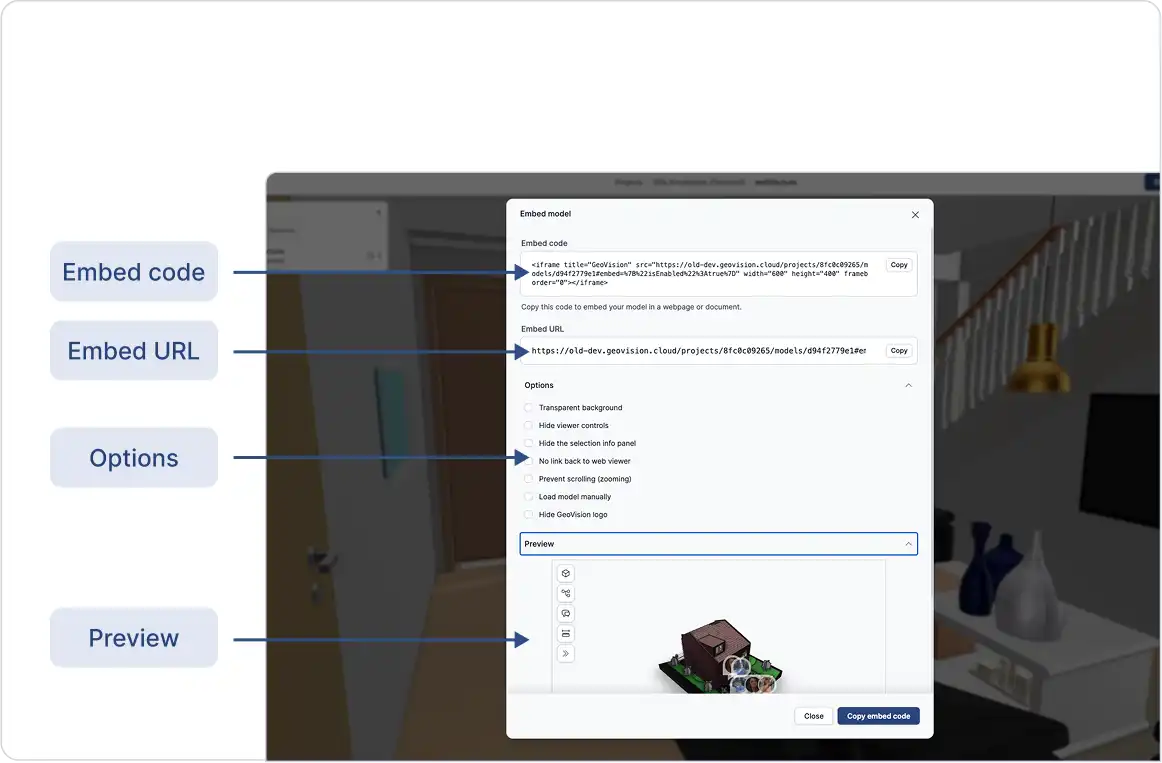
Loading a Model via URL:
You can load a model using a URL. In the project selection dialog, next to the search box, use the “Add model by URL” option and paste the model link there.
Supported Versions: GeoVision currently supports Rhino versions: 7 & 8.
Note: The Rhino plugin works on Windows only.
Setup
1. Install the Plugin
Install the GeoVision Rhino Plugin if you haven’t already. (See Installing Plugins for help.)
2. Open the Rhino Plugin
In Rhino, type GeoVision in the command line or go to the GeoVision tab in the ribbon.
Click GeoVision to open the Rhino plugin.
If you’re not signed in, select Sign in and link your GeoVision account.
Publishing a Model
1. Select Publish
Click Publish in the GeoVision plugin interface.
2. Choose a Project
Select an existing project. or
Click New Project to create a new one
3. Choose a Model
Select an existing model. or
Click New Model to create one.
4. Select Objects to Publish
In the Rhino viewport:
Select the elements you want to publish.
Click Publish.
Your model is now uploaded to GeoVision and available to your team for viewing and collaboration.
Loading a Model
1. Select Load
In the GeoVision plugin, click the Load button.
2. Choose a Project
Select the project that contains the model you want to load.
3. Choose a Model
Select the model you’d like to load into your Rhino session.
4. Choose a Version to Load
By default, the latest version appears first.
If you want to load a previous version, select it from the version list.
Your selected model is now successfully loaded into Rhino.
Important Notes on Rhino Publishing:
Supported Rhino Elements for Publishing:
All visible geometry types can be published, including hatches, text, and blocks. Each published object includes the following information:
Name
Color
Render material
User-defined attributes (user strings)
Publishing Models from Rhino Layers:
While publishing a new version, click the blue filter field at the top of the Select Objects dialog.
2. Choose “Layers” from the options. 3. Select as many layers as you’d like to include in the filter.
Fixing Incorrect Colors in the Web Viewer:
If your model appears with the wrong colors in the browser:
Open the model in the viewer.
In the sidebar, click the View Modes button.
Change the view mode to Shaded to display the correct colors.
Missing Objects after Publishing a Model:
After publishing your model to GeoVision, click the Report button to view any errors that may have occurred. Click on any item in the report to highlight it in your application. Some objects might not be supported for publishing and could be excluded automatically.
Important Notes on Rhino Loading:
Loading Models into Rhino from GeoVision:
When you load a model into Rhino, all objects from GeoVision are brought in as geometry, text, or blocks, mirroring the same layer structure as what you see in the web viewer. Each object retains key attributes, including:
Render material (if any)
Color (if any)
Name (if set)
Custom properties stored as user strings
Loading Custom Properties in Rhino:
All custom properties found under the properties field will be created as user strings in Rhino.
Missing Objects After Loading a GeoVision Model:
After loading a GeoVision model, use the Report button to check for any errors that occurred during loading. Clicking an item in the report will highlight it in your application. Note that some objects may not be supported for loading in Rhino.
Project Selection Disabled in the UI:
This occurs because you don’t have the necessary permissions to load the project. Please contact the project owner to request a role change.
Loading a Model via URL:
You can load a model using a URL. In the project selection dialog, next to the search box, use the “Add model by URL” option and paste the model link there.