
The full hierarchy of your model is available for inspection and exploration.
View Modes
Use view modes to find the best visual setup for design reviews, presentations, or model exploration.
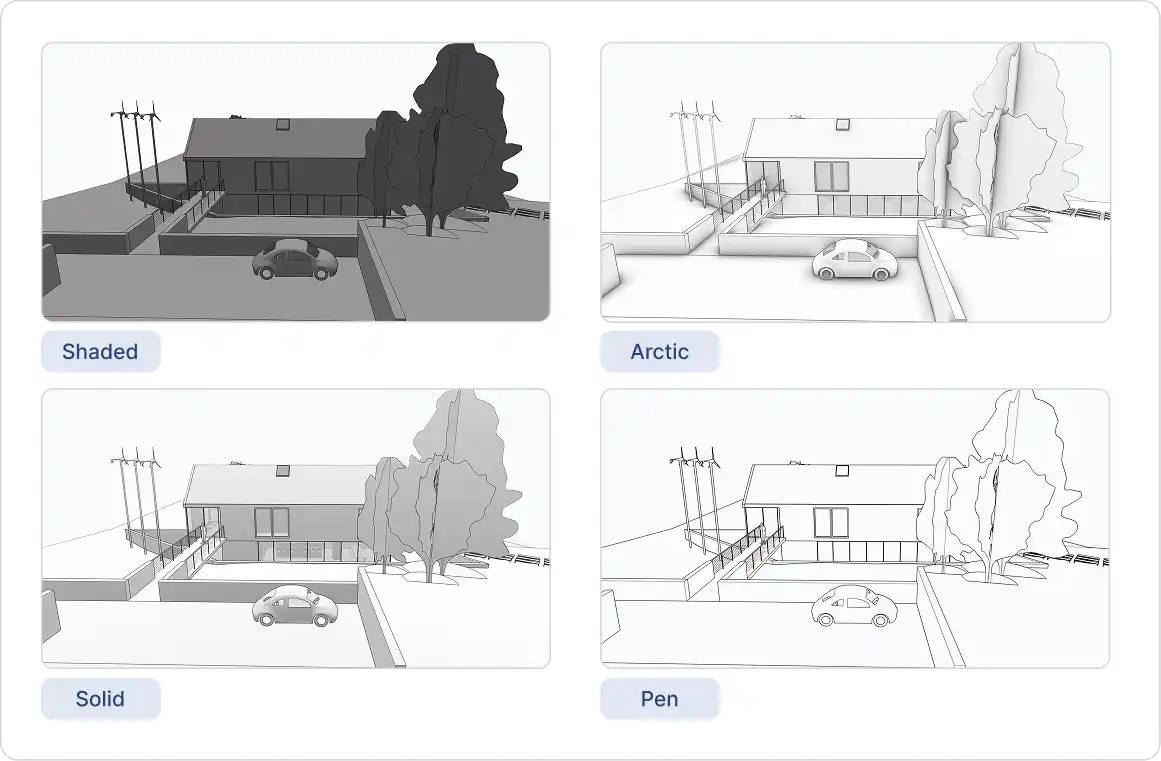
The different appearances of the available view modes.
View Mode Settings:
- Pick a Style: Choose from visual styles such as Pen, Arctic, Shaded, and more.
- Edge Toggle: Toggle edge lines on or off to highlight geometry or simplify the view.
- Line Thickness: Adjust line thickness for clearer outlines or visual emphasis.
- Change Color: Change outline colors to match your presentation or improve contrast.
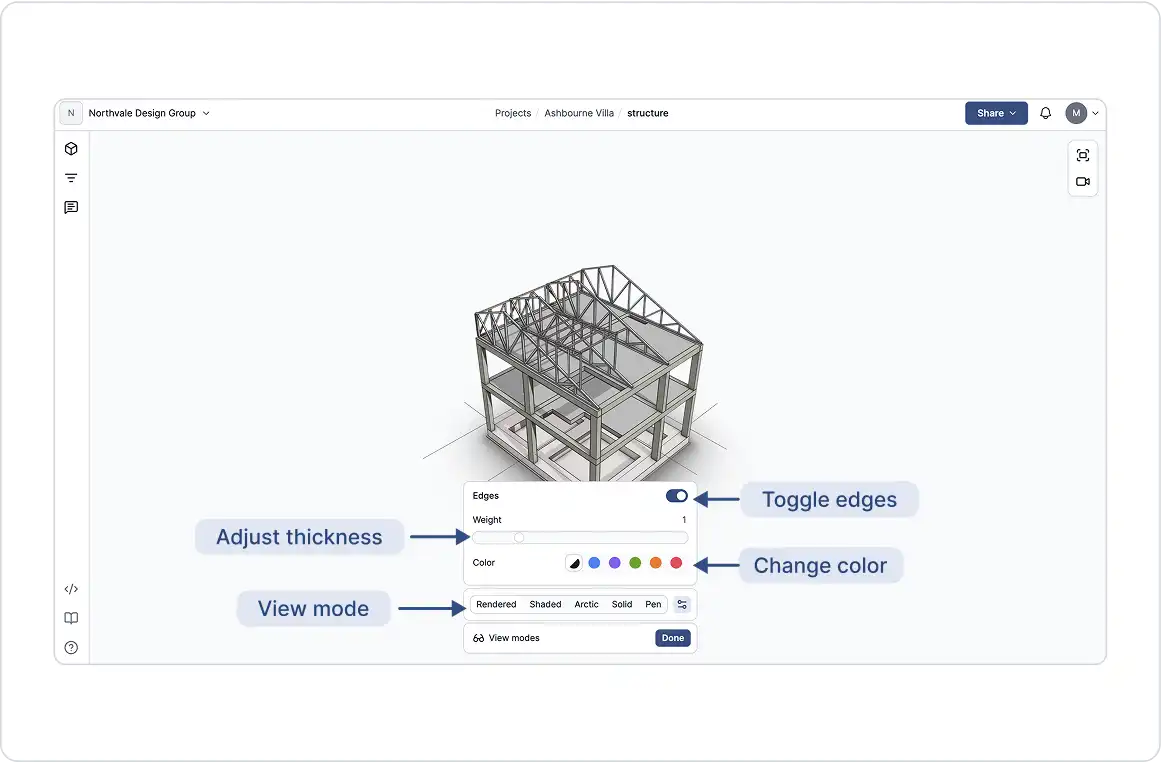
Select and configure the view modes.
Behavior and Limitations:
- Default View Mode: Not supported. View modes are set individually at view time. To preserve a specific view mode, create a comment, and all viewer settings will be saved when that comment is reviewed.
- Edge Visibility by Default: Edges are enabled by default and cannot be turned off permanently.
- Fixed Line Thickness Based on Model Scale: Not supported. Line thickness is relative to the view and remains visually consistent as you zoom in or out, rather than scaling with the model size.
- Edge Visibility in Detailed Models: Edges remain visible even in highly detailed models. GeoVision uses smart rendering techniques to balance clarity without overwhelming the view.
Section
The Section box allows you to isolate and inspect the internal geometry of your model by defining a 3D cut-through region. Easily position, rotate, and resize the box to slice through walls, floors, or other elements, exposing hidden details without altering the original model. This tool is ideal for creating focused views during presentations or design reviews.
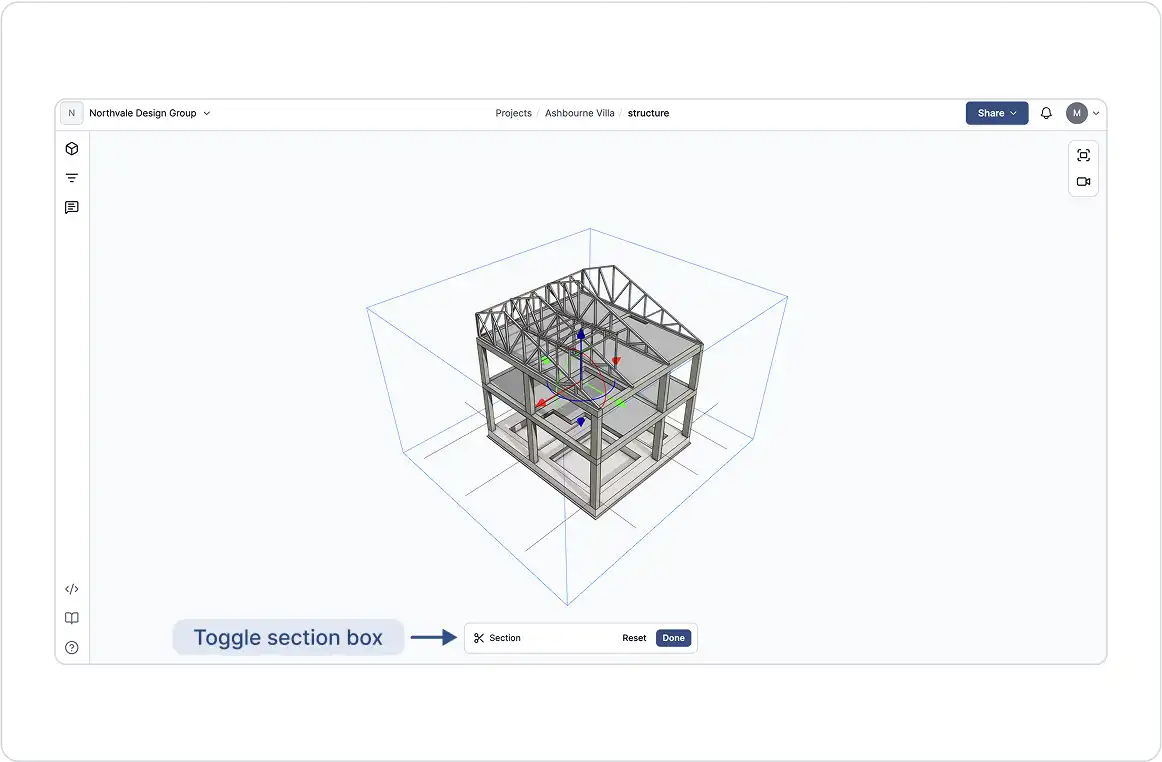
You Can Control:
- Position: Use the translation gizmo at the center of the section box to move it along any axis.
- Rotation: Use the rotation gizmo at the center to rotate the box around each axis.
- Size: Select a face of the section box, then use the translation gizmo on that face to move it in the perpendicular direction.
Behavior and Limitations:
- Default Section Behavior: The section tool always defaults to a 3D region that fits the bounding box of the model or selected elements. To preserve a specific section view, create a comment, and all viewer settings, including the section, will be saved when that comment is reviewed.
- IndividualSection Planes: Not supported. The section tool uses a single cuboid region that fits the bounding box of the model or selected elements.
- Multiple Section Boxes: Not supported. The section tool is limited to a single cuboid region that encompasses the bounding box of the model or selected elements.
Lighting Controls
Adjust lighting to enhance visibility and contrast, whether you’re inspecting fine details or presenting to stakeholders.
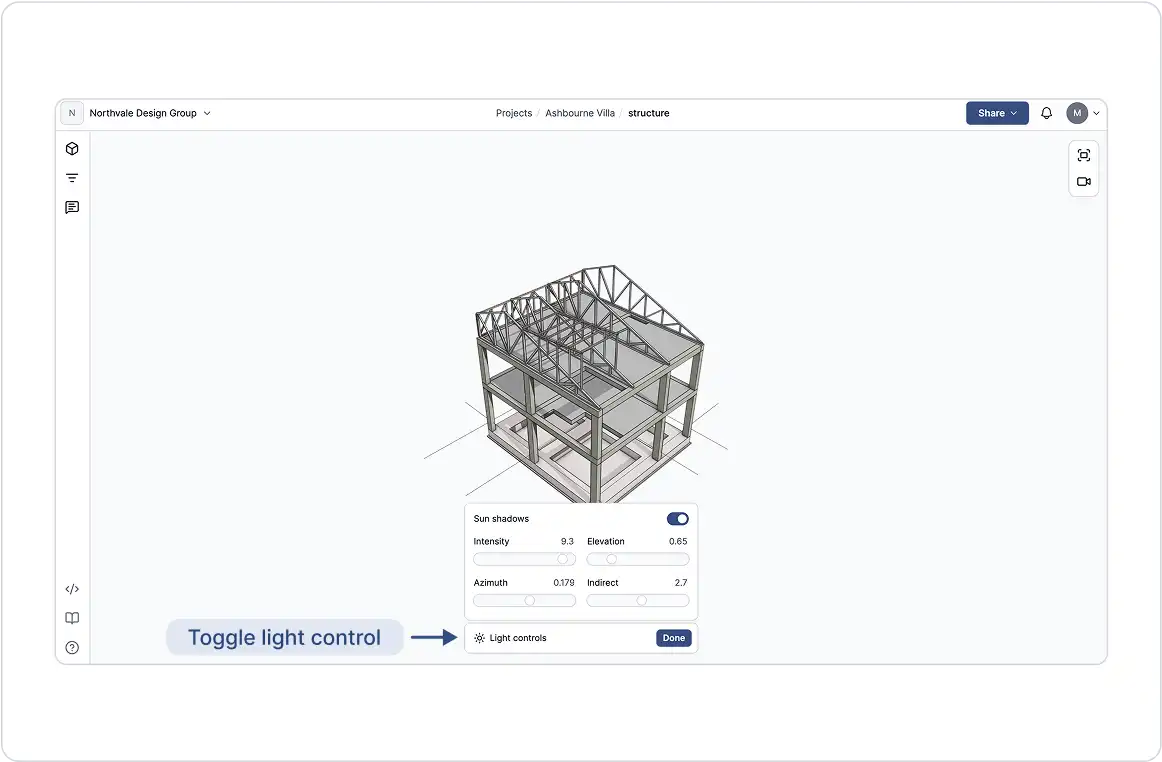
- Intensity: Control overall brightness.
- Elevation: Change the vertical angle of the light source to highlight different surfaces.
- Azimuth: Adjust the horizontal rotation of the light to control shadow direction.
- Indirect: Modify the amount of ambient or bounced light for softer, more realistic shading.
Behavior and Limitations:
- Default Lighting Settings: Lighting controls are applied per view at the time of viewing. To preserve specific lighting settings, create a comment, and all viewer settings, including lighting, will be locked in when that comment is reviewed.
- Real-Time-of-Day Lighting: Not supported. Lighting is simulated and relative to the model space, not tied to an actual time of day or geographic location.
- Shadow Export: Not supported. Shadows are only rendered within the viewer and cannot be exported.
Explode
Use the Explode tool to separate model components for a better understanding of how elements fit together. The elements that can be exploded depend on how the source application structures the model. If an element is grouped or aggregated as a single composite object, it may not break down into individual components when exploded.
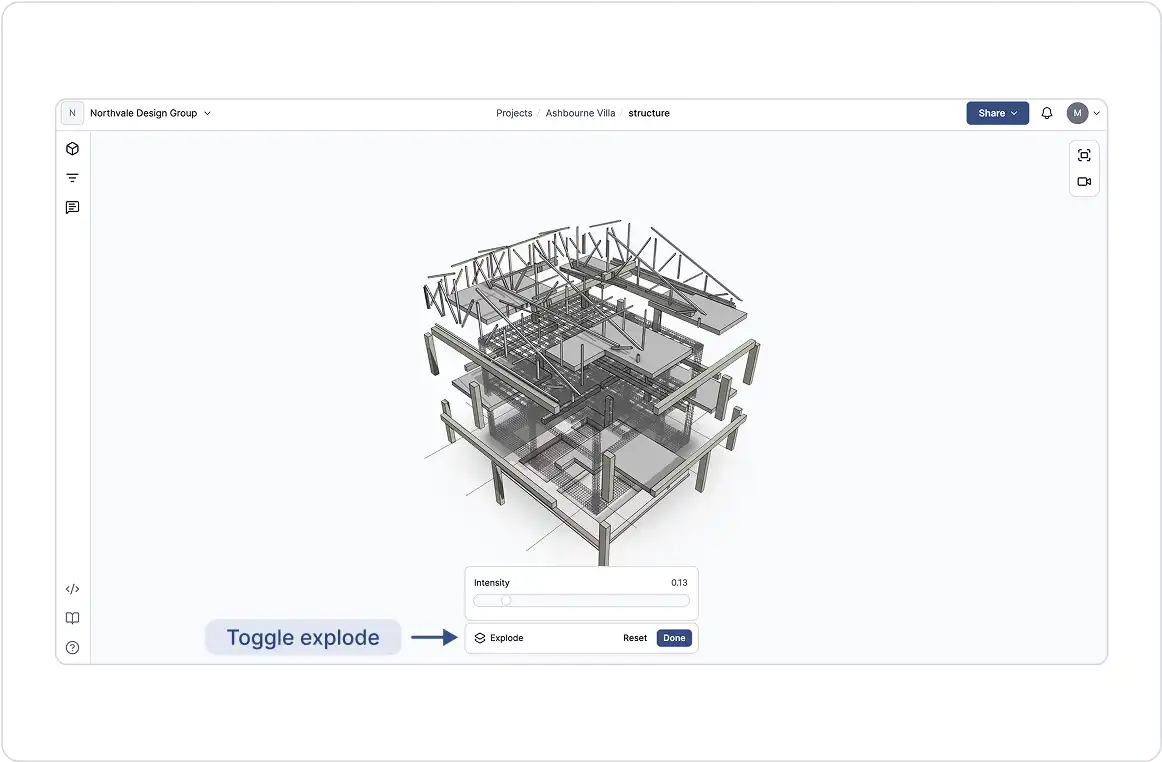
Behavior and Limitations:
- Explode Along a Single Axis: Not supported. The explode operation is radial, spreading elements outward from the center of the model in all directions.
- Explode by Floor or Element: Not supported. The explode function applies to the entire model and cannot be limited to specific floors or elements.
- Exploding a Sectioned Model: Supported. You can use the explode tool while a section is active to reveal internal components in more detail.
- Uneven Explosion Distances: This is expected behavior. The explode tool operates radially from the model’s center; elements closer to the center move farther, while those farther out move less.
Canonical Views
Set your camera to standard viewpoints: Top, Front, Left, Right, and Back.

Behavior and Limitations:
- Default Canonical View: Not supported. The canonical view defaults to a top-down perspective (from left to right). To preserve a specific view, create a comment, and all viewer settings, including the view, will be saved when that comment is reviewed.
- Additional Canonical Views: Not user-defined. Canonical views are predefined, but some connectors may publish extra views that appear in the canonical views dropdown.
- Levels and Grids in Canonical Views: Not supported. Canonical views display only 3D model data. Although levels, grids, and other 2D elements can be included in models sent to GeoVision, they are not shown in canonical views.
Projection
GeoVision’s projection settings let you switch between viewing styles for better spatial understanding or technical review.
Projection Types:
- Perspective: A realistic view with vanishing points, perfect for presentations and spatial understanding.
- Orthographic: A flat, scale-accurate view without perspective distortion, ideal for precise measurement and technical review.
Projection Types:
- Default Projection: Not supported. The viewer defaults to perspective projection. To save a specific projection, create a comment, and all viewer settings, including the projection, will be preserved when that comment is reviewed.
- Adjusting Field of View (FOV): Not supported. The FOV and aspect ratio are fixed, roughly equivalent to a 50mm lens on a full-frame camera.
Fit
The Fit tool adjusts the camera to fit the entire model in the view. If one or more objects are selected, the Fit tool adjusts the view to focus on those elements.